I posted a repair log of this nice game on Jammarcade :
Enjoy your read !

I posted a repair log of this nice game on Jammarcade :
Enjoy your read !
Not so long ago Hokuto left a comment on the Namco System 2 Keycus Hacks page regarding a problem with the hack for Valkyrie No Densetsu : the keycus protection chip was also used as a random number generator in the game, leading to strange behaviour alteration …
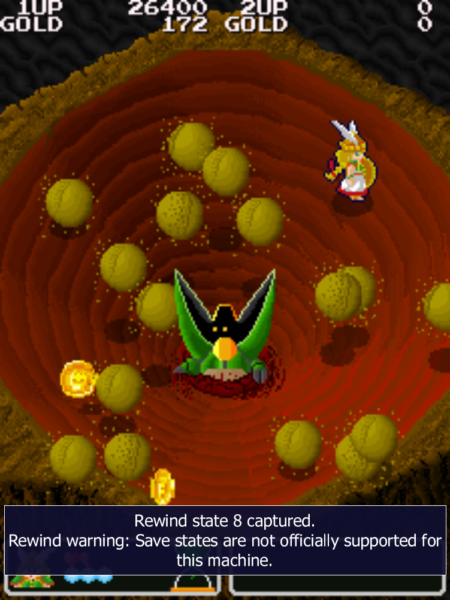
One of the baddies (Arijigoku aka Antlion) is supposed to throw round projectiles around him, in a random pattern, as you can see in the following Mame capture :
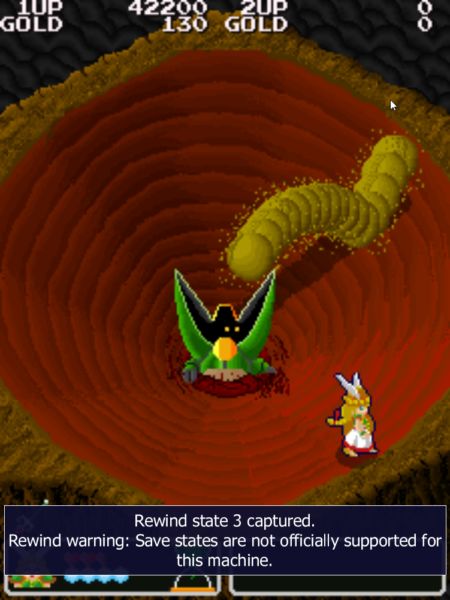
My hack consisted in removing all keycus memory area calls and replacing them with the “no operation” instruction. It works well when the chip is just used as a protection (check Namco System 2 keycus hacks for more info), but it completely defeats its role as a random number generator. With my hack, the projectiles are thrown in straight lines, as you can see below :
In order to restore correct throw behaviour, I created a pseudo random number generation routine in 68000 assembly that I added to the program rom, and replaced previous keycus calls used to get the numbers by a call to this routine.
I had to tweak the code a few times to achieve a good enough result (ie fast and with no visible repeat pattern) as it’s not possible to have a real random number generator. It involved intensive testing in Mame as there’s no savestate available for this game, meaning that I had to speed run the first part of the game to get to the point where the problem appears at every code update …
As you can see below, it works quite well 🙂 (sorry for the animated gif size)

You can grab the updated files in the Namco System 2 Keycus Hacks page.
Hi there,
Hokuto tested the Valkyrie No Densetsu hack and had some issues with it. I did a more in depth research in the file and found a keycus call that slipped through the net … I removed it, and you can download the updated file on the related page.
Cheers !
Last year Guru asked me if I could alter the program code of a Final Lap 2 so it would bypass access to the protection chip which had failed. The protection chip, known as ‘keycus’, is used on various Namco arcade systems.
Final Lap 2 runs on the System 2 hardware, 68000 based. As I have some experience about 68000 programming, I gave it a go.
The keycus is accessed between address 0xd00000 and 0xd0000f, and generally returns random numbers which are expected by the system.
Keycus ID for Final Lap 2 is C318. When you try to run the board without it, you get this message on boot up :
RAM ERROR
C00400
I did search the program rom for access to the keycus area, and bypassed them. The modified program rom was then tested successfully on real hardware.
Next on line was Final Lap 3. This one uses 2 keycus chips for protection : the C318 (same as Final Lap 2) and C341. When either of the chips fails or is removed, the message
SYSTEM DOWN!
appears at boot up.
I used the same method as for Final Lap 2, and the modified version was also confirmed working on real hardware.
I ended up patching all System 2 games using a keycus for protection, for a total of 22 games (39 different sets), listed below :
Files are available here or in the Download section.
All the sets have been successfully tested on Mame, but only 4 of them were tested on real hardware so far. So if you are testing one of those that have not been tested yet, don’t hesitate to send a feedback, I’ll gladly add it to the list 🙂
All the hardware information used in this post was provided by Guru.
Hi there !
2 posts on the same day ? Watch out for hail 😀
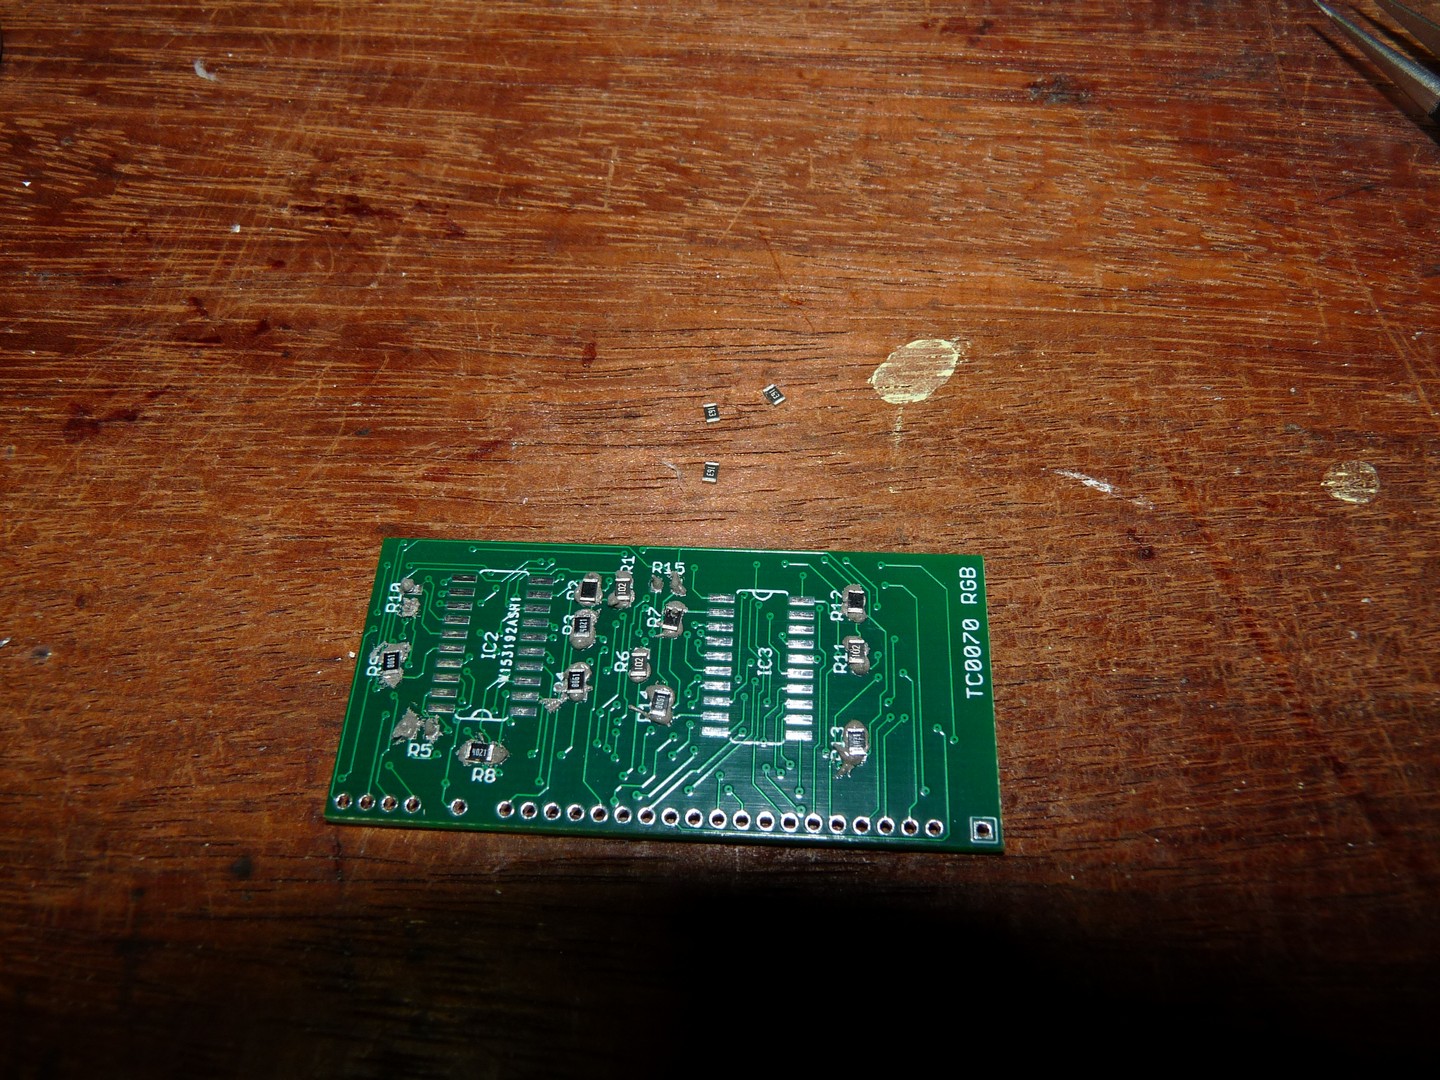
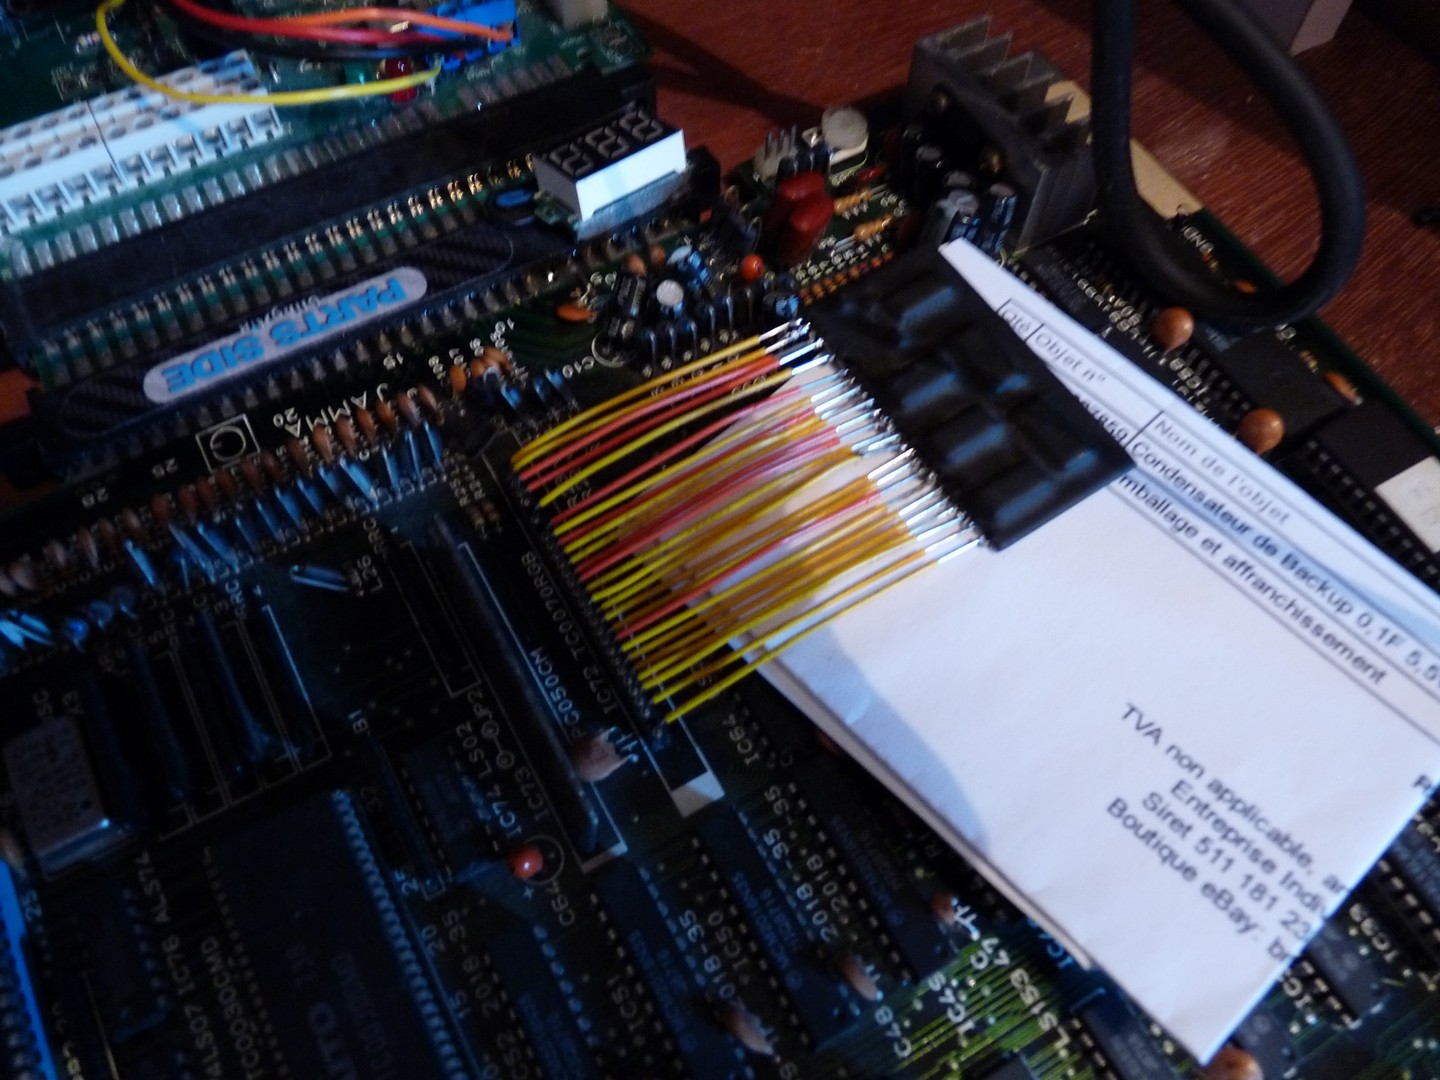
A few years back I bought a Rainbow Islands pcb, the mythical Bubble Bobble sequel from Taito. I got it pretty cheaply then because of a very simple reason : the custom chip handling the colors (the infamous TC0070RGB) was in a very sorry state, and the game couldn’t run properly.
This custom chip is in a SIL package (Single In Line), soldered vertically to the pcb, making it really vulnerable to physical shocks.
The board was clean, but the custom was torn off and soldered back using component legs … as solder isn’t known for its mechanical strength, this repair couldn’t last.
Check it out :
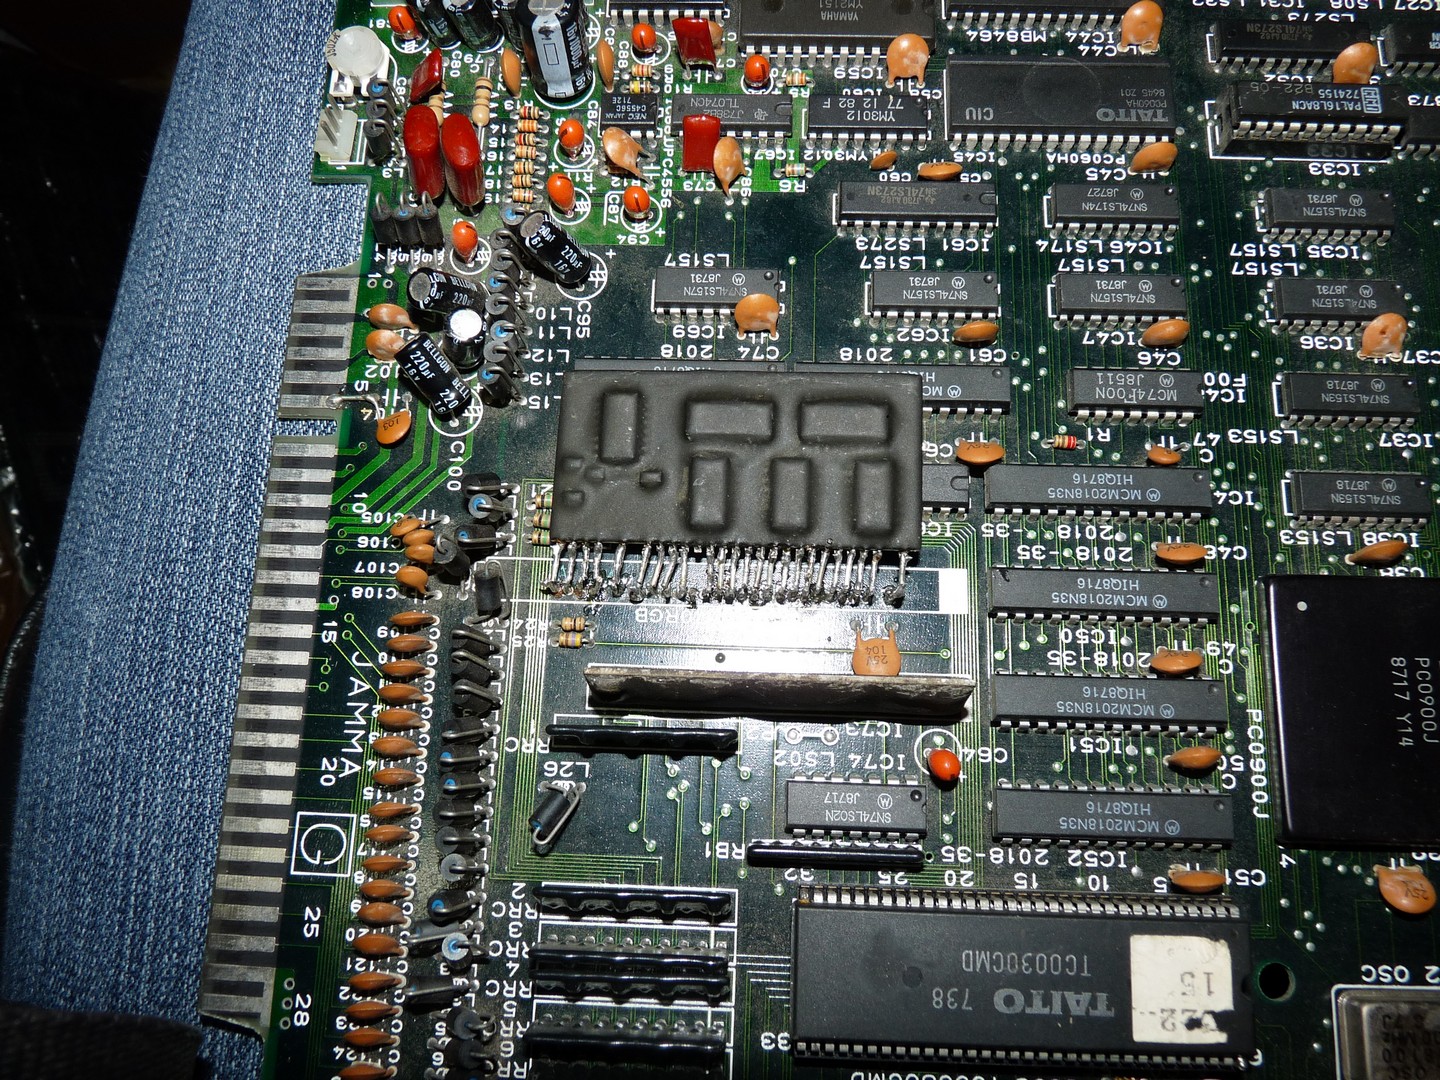
Unsoldered legs, loose connections, etc. … there’s a lot to do !
As I had various other ongoing projects at the time, and above all I didn’t know to tackle this issue I moved on something else and forgot this board in a cardboard.
A few months back I came across someone’s website offering print draft of this custom chip. They weren’t available online anymore due to some abuse, but after some time we came to an agreement and he provided me with the files in order to do some real testing.
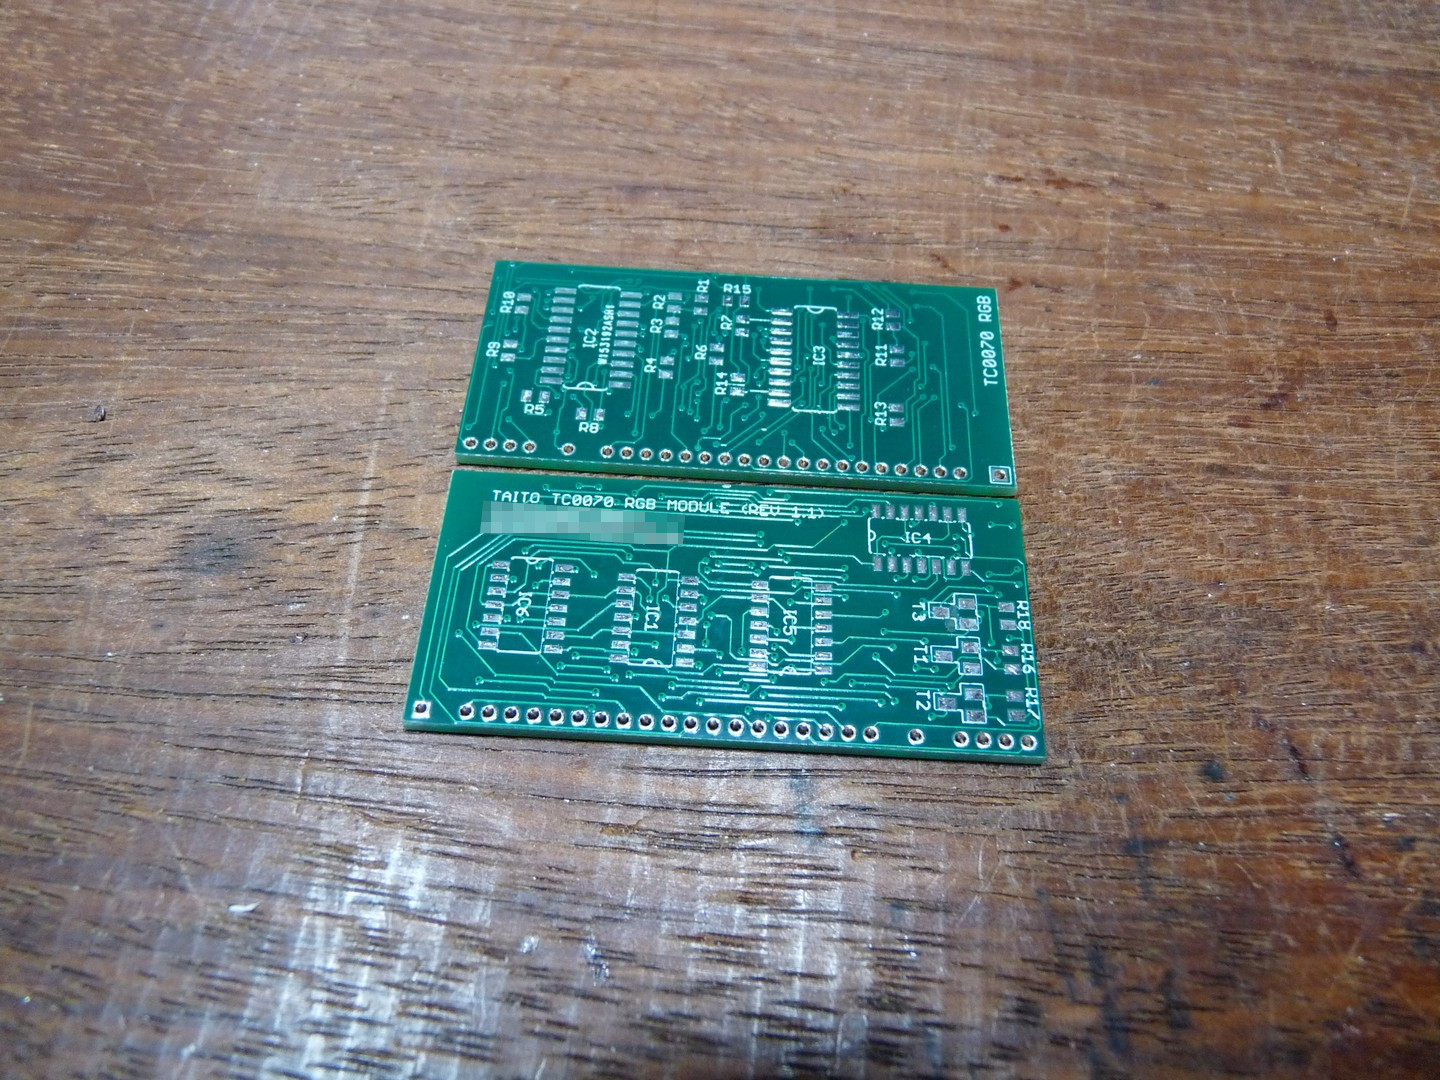
I ordered 5 pcb pieces from PCBWay (minimum order), and started looking for the parts needed. The pcb uses CMS 0805 parts, I never had the chance to work on a project of that scale with parts that small.
Here are the pcbs from PCBWay (I removed the markings from the picture as I don’t want the person to be annoyed because of me 😉 )
Placing resistors before hot air soldering (it’s really small, magnifier recommended !)
Soldering done ! A bit of cleaning is needed, and I have to remove excess solder (hard to measure out with the needle), but it’s not that bad actually …
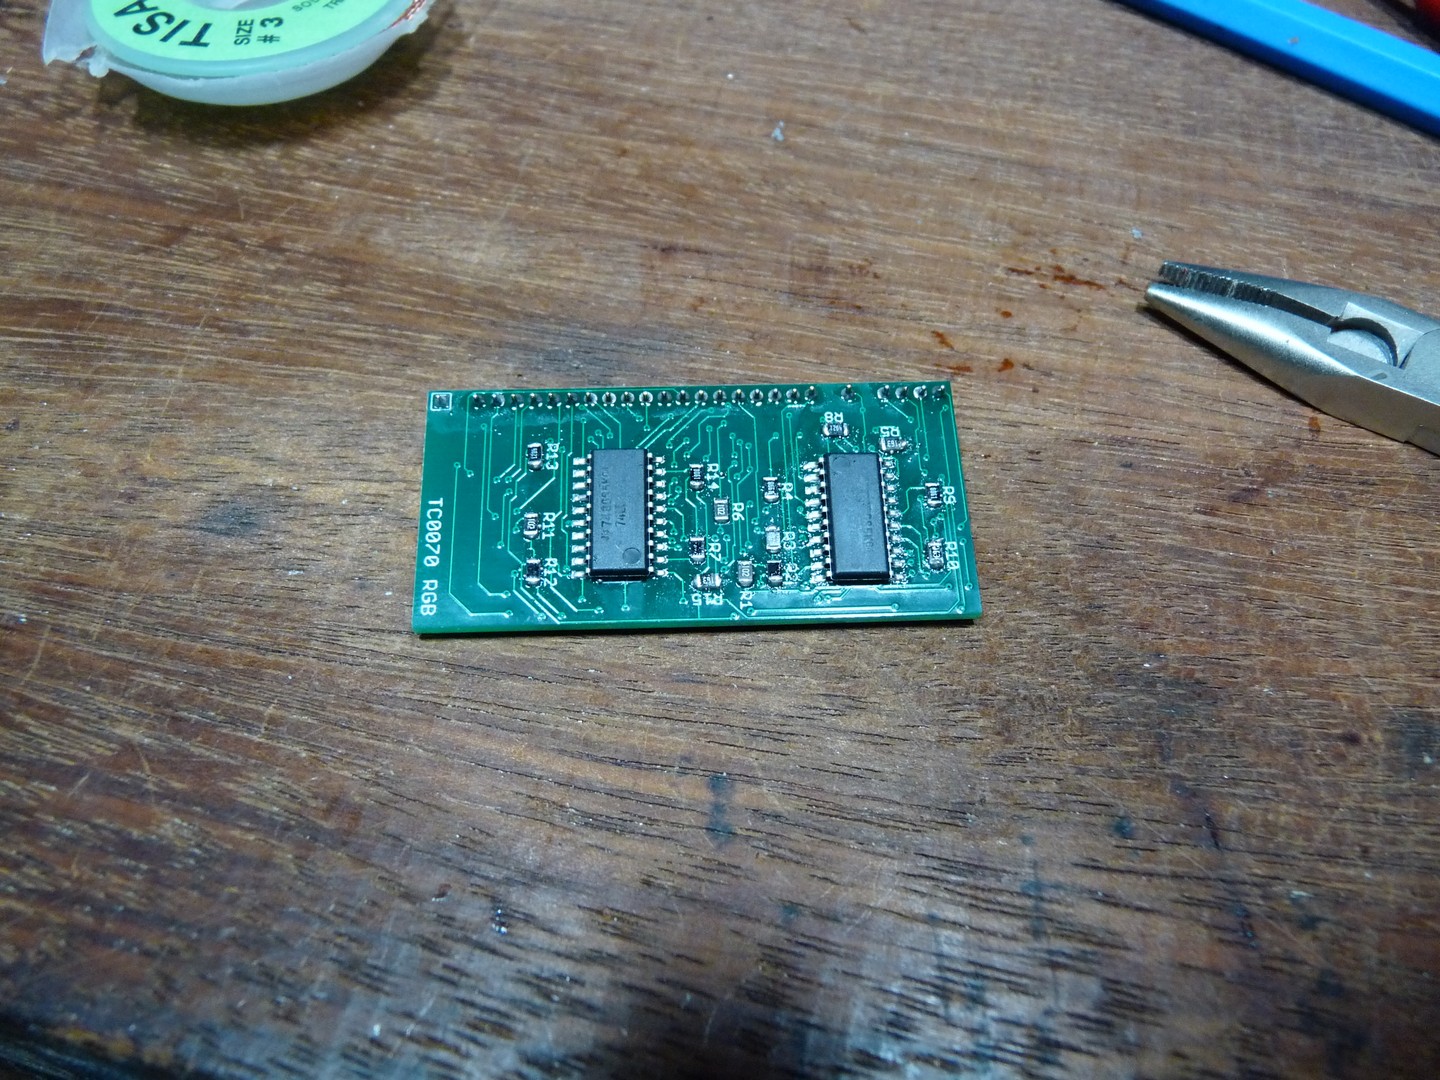
Added a socket a make testing easier.

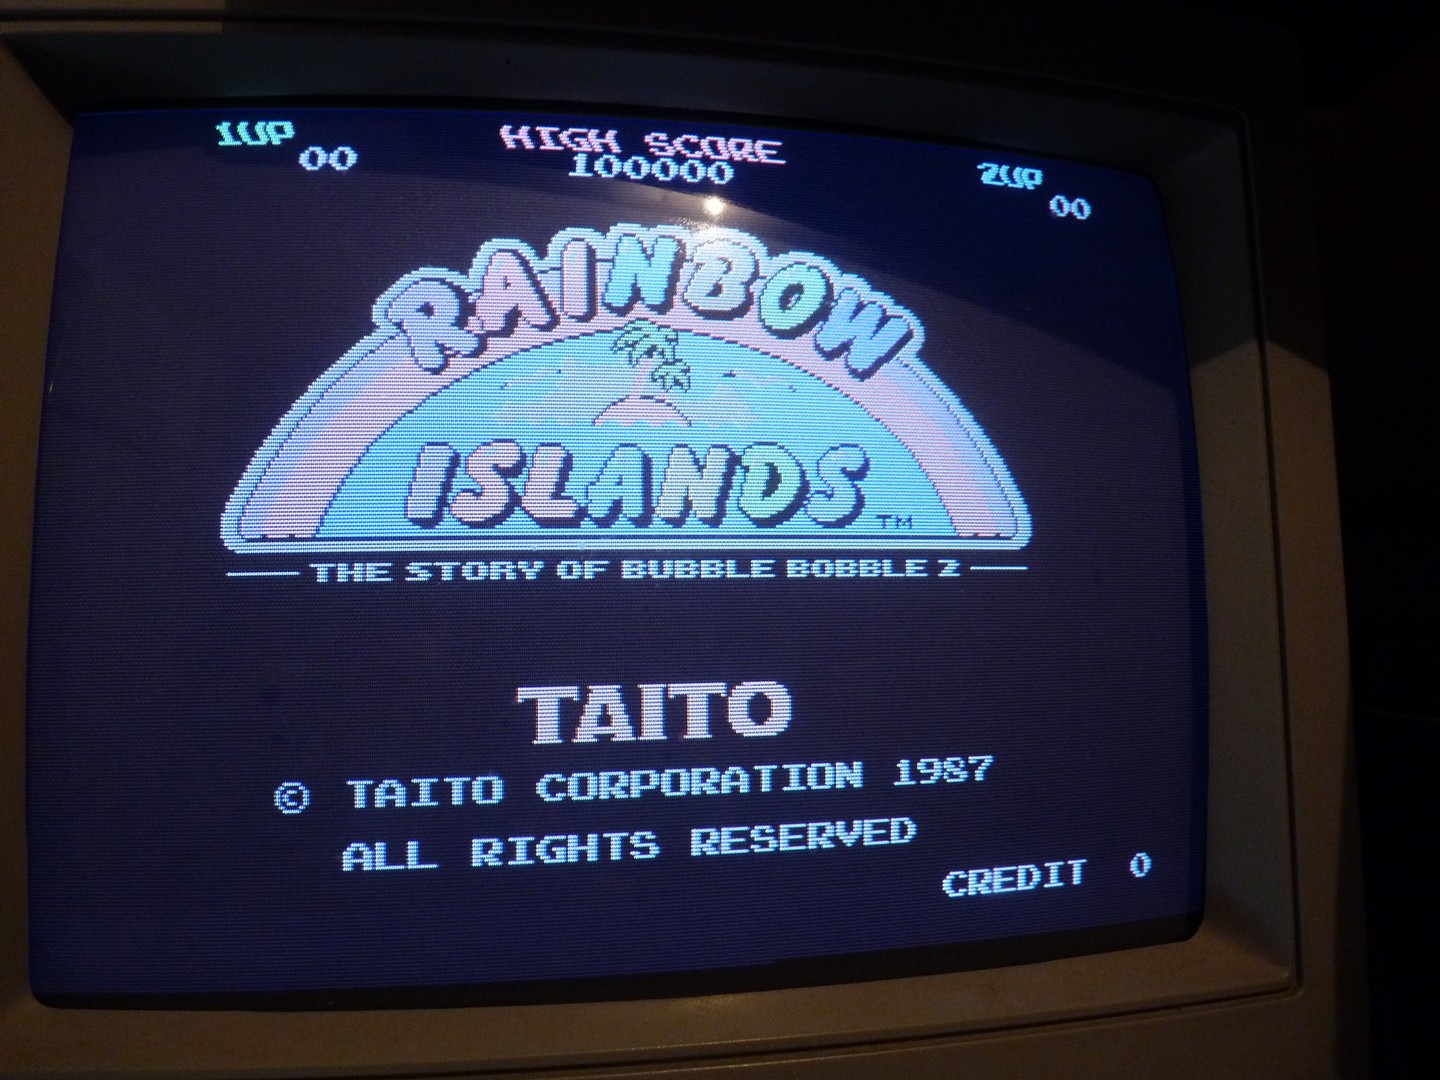
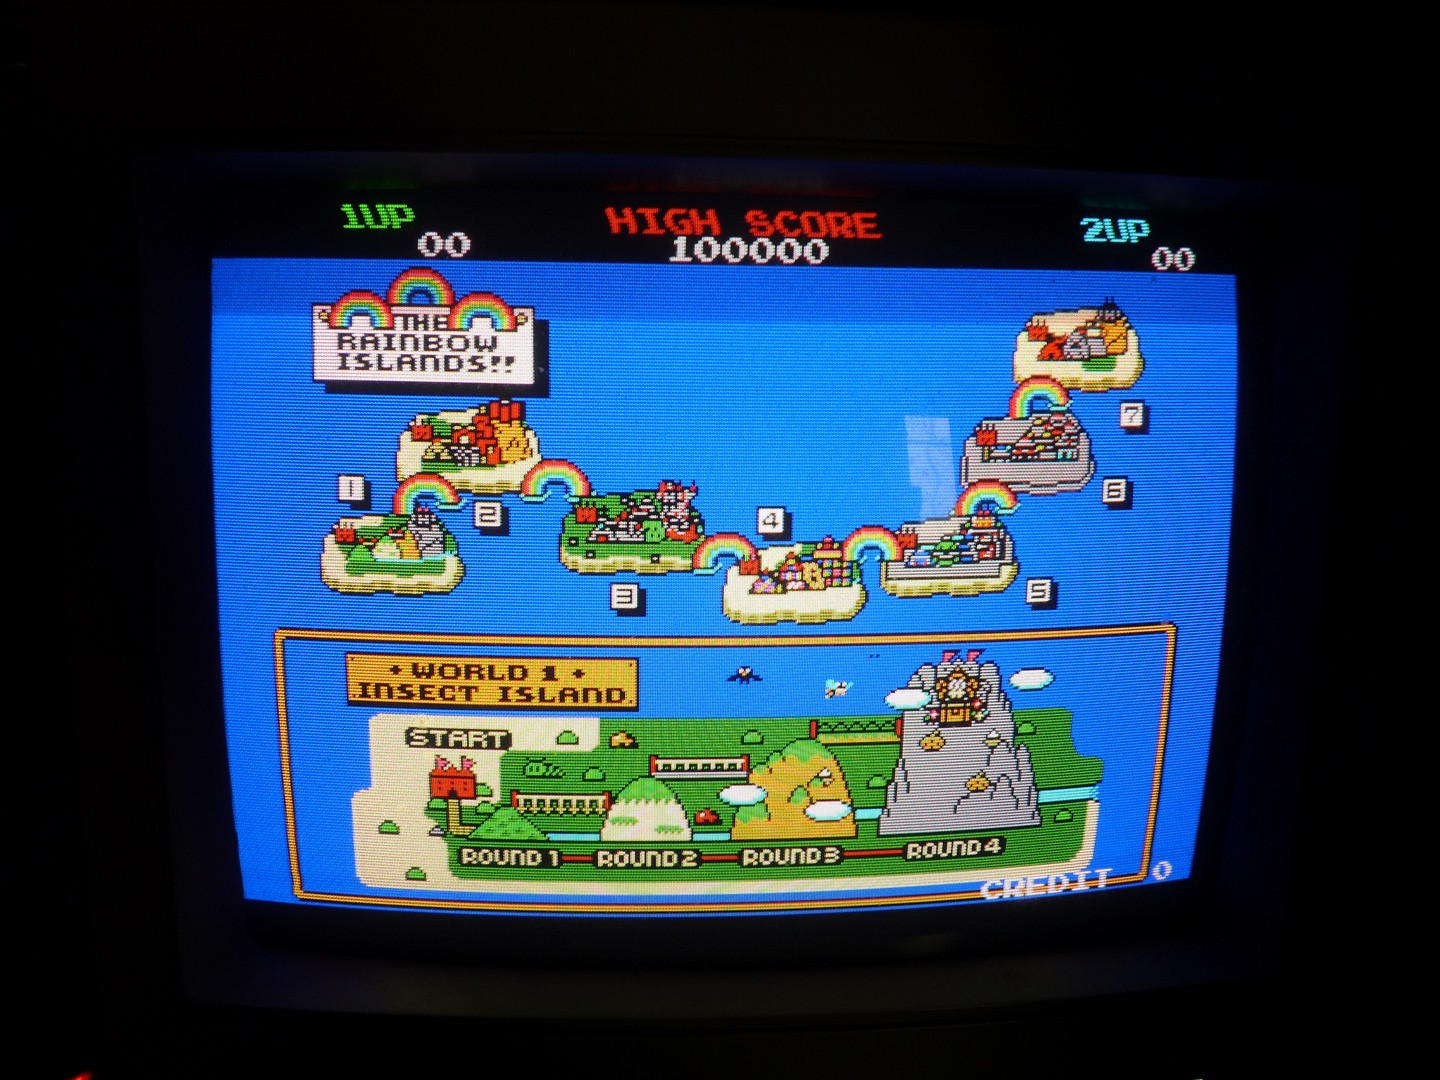
Fresh new custom is plugged in, and …
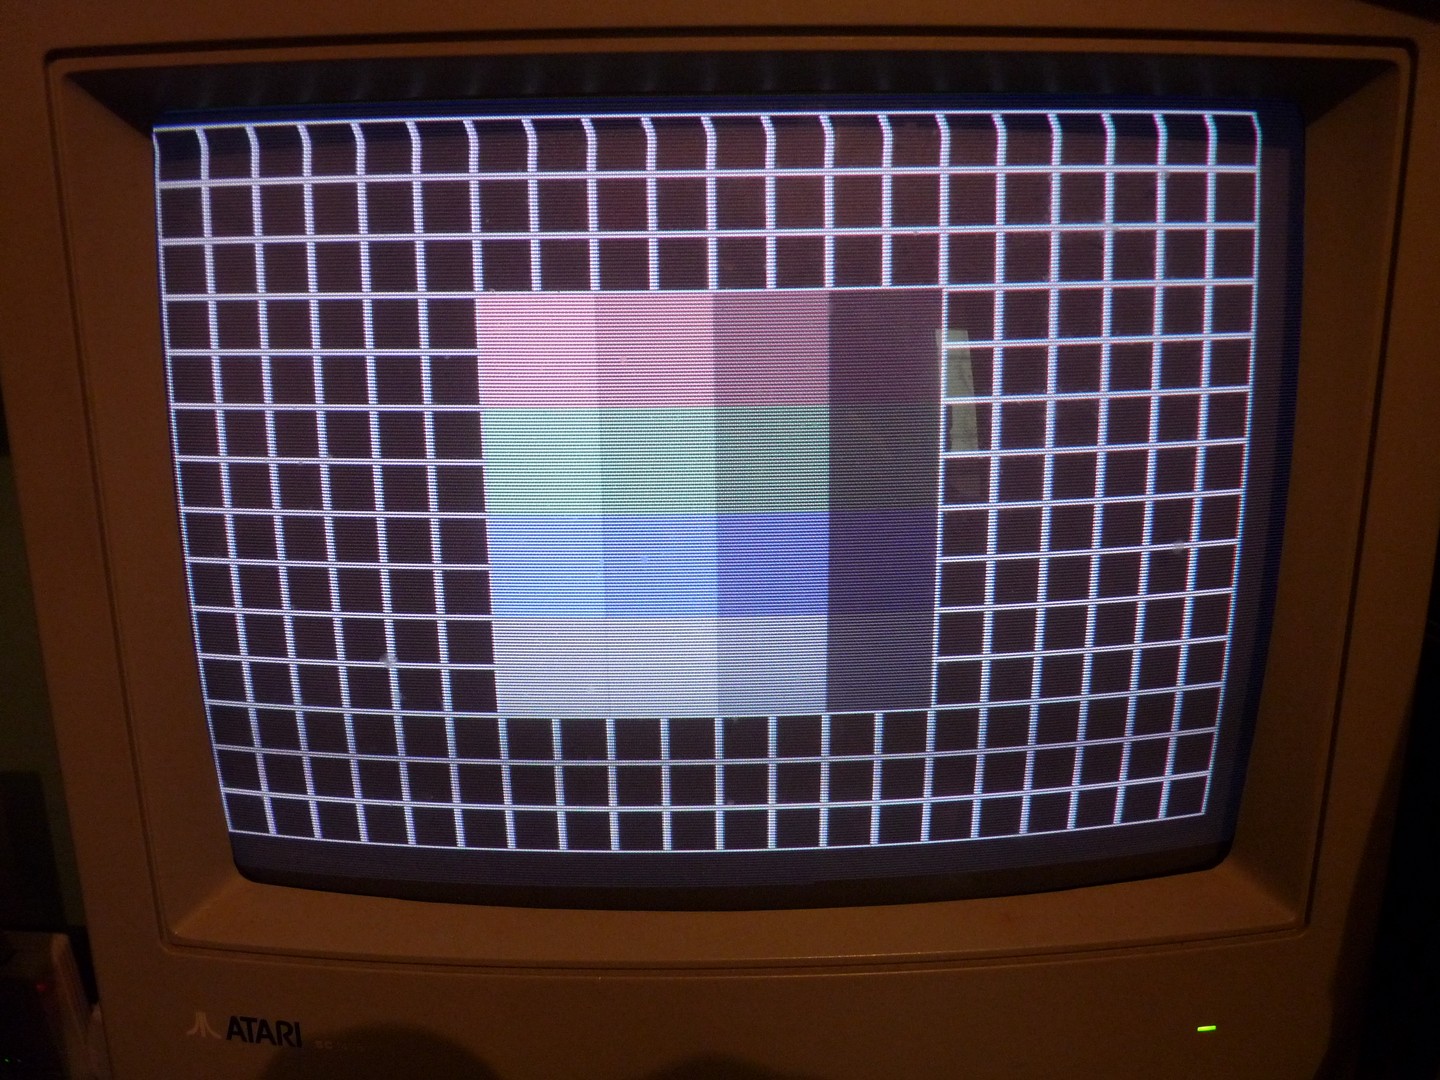
Yikes … what’s happening ? Colors are there but seem washed out … looks like a grounding problem.
To be sure I rewired the original custom to the board, in order to rule out a pcb fault :
And everythings fine, so the problem is inside the new custom :/
After discussing back and forth with the designer, he detects a ground difference between 2 parts, and recommends me to add some kynar wire between 2 locations … I do as he says, and …

Great ! Quite happy to add this one to my collection 🙂
Cheers !
Hi there !
System 16B version of Sukeban Jansi Ryuko (317-5021), using a FD1089B is now available , you can grab it from Jammarcade, as usual.
I don’t think much people will be interested in it, as it’s a mah-jong game using a dedicated controller …
Cheers !
Happy new year everyone !
Regarding configuration files for SegaDecrypt, I decided to give libconfig a go as a replacement for my big clumsy xml file. I went for version 1.5 as the last version (1.6) has some problems preventing it to compile on my dev setup.
Now each set has its own configuration file, as you can see in the following example, extracted from a real set :
//--------------------------------
// Super Hang On Sitdown 317-0039
//--------------------------------

name =  Super Hang On Sitdown;
version =  317-0039;
protection =  FD1094;

program:
{
    files = [
         epr-10857.25,
         epr-10859.31
    ];
    key =  317-0039.key;
    size = 0x20000;
};

override:
{
    process_data_manually = true;
    irq_vector_lower_bound = 0x108a;
    irq_vector_upper_bound = 0x108a;
    post_decryption_copy = (
        (0x400, 0x1000,  DATA ),
        (0x1A22, 0x20000,  DATA )
    );
};

crc:
{
    type =  outrun ;
    storage_address = 0xFF0;
    start_address = 0x1000;
    initial_block_size = 0x1F000;
};
Almost everything can be overridden, allowing to handle specific cases required for some sets.
Now that the configuration problem is solved, I started working on the MC8123 decryption. The MC8123 is a Z80 with built-in encryption, Program opcodes and data are encrypted differently, which explains why bootleggers used doubled eproms back in the days : one half was used for the decrypted program, the other half for the decrypted data, and the correct addressing was chosen at runtime.
Using the same technique I used to decrypt FD1094 files, I should be able to generate decrypted files for MC8123.
There are some difficulties though :
Time to get my hands dirty !
I migrated enough of the FD1094 part of SegaDecrypt to work on the decryption of a freshly released Super Hang On version. It’s the sitdown one (317-0039).
The decrypted set is available as usual at Jammarcade.
I have more sets in the pipeline, but I want first to change the way configuration is handled, as I’m fed up to deal with a big clumsy xml file. A lot of sets use specific code, and moving it to a xml file won’t be easy to maintain. So I’ll move to a plain text per game configuration file, using libconfig.
That’s all for now !
While I was gathering information about how various Sega encryptions worked, it became obvious that some had a lot in common. So I decided to regroup all the decryption routines into the same software, to be able to capitalize on previous work instead of starting from scratch when working on a new decryption.
I just finished adding FD1089A/FD1089B decryption to the software, meaning that I can generate decrypted sets for PCBs using this kind of encryption. So far Aurail is done (sets 317-0167 and 317-0168), and checksums are automatically fixed. You’ll be able to get them from Porchy’s when the sets will be uploaded.
I’ll try to add more decrypted sets when I have some spare time, but if you need one quick just drop me a line 😉
Next step decryption wise will be to move FD1094 decryption code to the new software. After that I’ll have a look at System 24 FD1094 (floppy drive based), and MC8123 (Z80 based, which I’m far from being fluent with :p
Cheers !
As I was converting different VDP2 modes to the new cache, I came across testing the game 3 Dirty Dwarves. This game got a strange problem since version 0.32, as main player characters weren’t being diplayed on screen : you could move around, see bullets fired, or punch the villains, but that was it. You could only guess your position by the scrolling moves.
At first I thought it was related to the DSP, as some games use it to do some sprite calculations, but after a quick check that wasn’t the case.
Some more tracing lead me to some unmapped memory access (which wasn’t logged for some reason), and reading through the SH2 hardware manual gave me the aswers I was looking for : the SH2 has an internal cache (4KB of data, and 1KB of addresses), which can be configured to be used as a 4 ways cache (all the data cache is used as instructions / data cache), a 2 ways cache (the first half is used as a high speed RAM, and the other one as regular cache), or completely disabled (4KB used as high speed RAM).
After adding this 4KB area to the memory map of the emulator, bingo ! The sprites are displayed 😀
Check the screenshots from current dev version :


I’ll try to add later some code to mimic the cache behaviour …